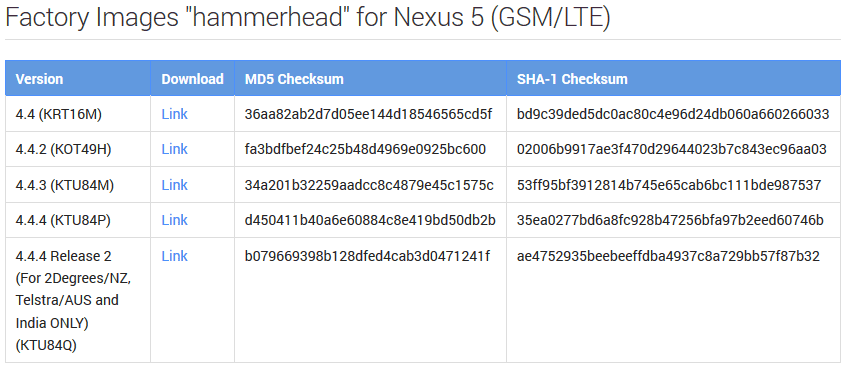
This article will show you how how to downgrade from the Android L developer preview to Android OS 4.4.4 on a Nexus 5.
Disclaimer: FlexiSPY is not responsible for the steps inside this article. However all care has been taken to make sure that the information contained here is as accurate as possible. Please read and follow the instructions carefully and remember that downgrading the OS is entirely your own responsibility and FlexiSPY is not responsible for it in any way.
Why downgrade?
We’ve already published articles on how to install the Android L developer preview on a Nexus 5 here. However Android L is still under development which means that certain features, functions or software may not work entirely as expected. It is also not recommended to run an OS that is currently in development on your main phone for reasons mentioned above.
This means that ultimately you may wish to downgrade back to the latest version of the Android OS which is stable and works. In this case, for the Nexus 5, this is Android OS 4.4.4 and the process for downgrading from the Android L developer preview back to Android OS 4.4.4 on a Nexus 5 is actually not as hard as you may think.
What’s needed to downgrade?
In order to downgrade the Nexus 5 from Android L you need the following:
- The Nexus 5 running Android L
- A PC
- The Nexus 5 OS 4.4.4 recovery image
On the PC that you will be using to downgrade you must have first of all set up the Android environment correctly such as installing the Android SDK, setting the Windows path for Fastboot, making sure the bootloader of the Nexus 5 is unlocked and installing the correct Google USB driver so that the Nexus 5 is recognised completely by your PC when you plug it in.
This article is written assuming that you have done this already. If you have not then you can learn more about setting up the Android environment needed by reading the first article in this series detailing how to upgrade to the Android L developer preview which you can find here.
Step 1 – Download the Android OS 4.4.4 image
The first you need to do is download the Android OS 4.4.4 image from here. Google provides these images for you so that you can easily downgrade the Nexus 5 should anything go wrong or reinstall the current OS version if the Nexus 5 is running OS 4.4.4.

Please make sure that you download the correct version for the Nexus 5 model you are working with.
Once you have downloaded the image file save it in a convenient location such as your desktop.
Once you have saved the image file to your computer you must extract it to gain access to the files that are required to start the flashing process.
Once you have extracted the files inside the downloaded image file it should look like the picture below.
Step 2 – Flash the Android OS 4.4.4 image to the Nexus 5
We already mentioned that we assume you have already set up the Android development environment on your PC but again, if you need a refresher, read the article here.
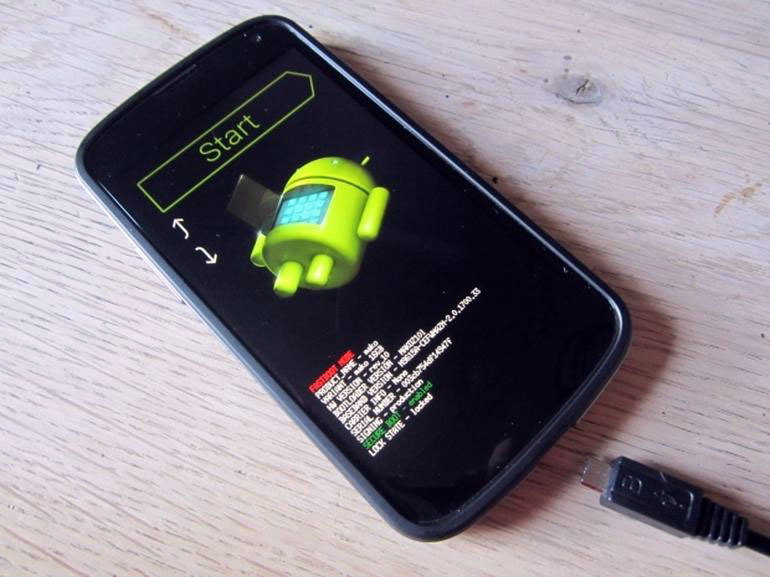
To flash the Android image you first need to put the Nexus 5 in Fastboot mode.
This is done by doing the following:
- Make sure the Nexus 5 is turned off completely.
- Connect the Nexus 5 to your PC using the USB cable
- Hold down the volume down button and the power button together to turn it on.
If done correctly the Nexus 5 will turn on in Fastboot mode and it will look like the picture below.

With the Nexus 5 in Fastboot mode and connected to your PC browse, on your PC, to the folder where you saved the Nexus 5 Android OS 4.4.4 ROM.
Simply double-click flash-all.bat and wait for the Nexus 5 to complete the steps and, once done properly, the Nexus 5 will restart and it will be running OS 4.4.4 again.
