


[hoops name=”Rooting Guides Are No Longer Maintained”]

The HTC One is one of HTC’s most popular flagship Android models, in the following guide you’ll learn how to Root it.
Disclaimer: FlexiSPY is not responsible for rooting the Android device in any way, before performing any of these steps make sure you back up your Android device completely. Rooting is done entirely by you at your own risk.
What is needed to root the HTC One?
To root the HTC One you will need the following.
- The HTC One you want to root in your hand.
- A PC.
Step 1 – Unlock the HTC One bootloader
To root the HTC One you first need to go to the HTC website and unlock the bootloader of the phone. Until you do that rooting cannot take place.
You can start the bootloader unlock process here.
Essentially what happens is that you have to connect the HTC One to your PC and use Fastboot to execute a command to get a unique ID that you then type in to the HTC website above to generate a bootloader unlock code that, on the PC (with the HTC One still connected) you enter to then unlock the bootloader.
Full details of the entire process are given on the HTC website above.
Step 2 – Install TWRP recovery on to the HTC One
In order to install SuperSU and root the HTC One you must install TWRP recovery on to the device first. This can only be done if you have successfully unlocked the HTC One bootloader in the previous step.
You can download TWRP from here. Make sure to choose the correct HTC One variant from the list.
You need to save the TWRP file on to the HTC One in the same place that you saved the Fastboot and ADB files from step 1 when you unlocked the bootloader.
After you have downloaded the TWRP recovery file rename it so it is called TWRP.img – you will need this file later.
Step 3 – Use Fastboot to flash TWRP to the HTC One
You need to first put the HTC One in Fastboot mode.
To do this follow these steps.
- Power off the HTC One completely.
- Hold down the volume down and power button at the same time.
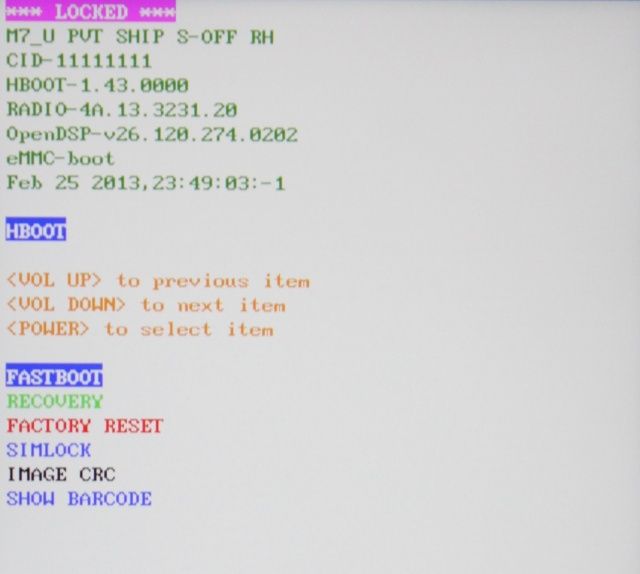
- If you have done it correctly the phone will turn on looking like this
- Make sure ‘Fastboot’ is selected and then press the power button to confirm. If done properly HBOOT will turn in to FASTBOOT.
- Connect the HTC One to your PC using the USB cable.
- Open up a command prompt in Windows and access the folder on your PC where you saved TWRP and the ADB and Fastboot files from the previous steps.
- Type ‘fastboot flash recovery twrp.img’ (no quotes) and press Enter. The TWRP file will be flashed to the HTC One
- Once it has finished restart the HTC One.
Step 4 – Root the HTC One
Now that you have successfully unlocked the HTC One bootloader and flashed the TWRP image file to the phone it is time to root the phone.
To do this you first need to download the SuperSU zip file which is located here.
Save this to your computer in a safe place.
Connect the HTC One to your PC and copy the SuperSU zip file you just downloaded to the HTC One (for example, to the Downloads folder).
Once you have done that turn off the HTC One completely. It is time to flash SuperSU and root the phone which is done using the following steps.
- Power off the HTC One completely.
- Put the HTC One in Fastboot mode as given in the previous step.
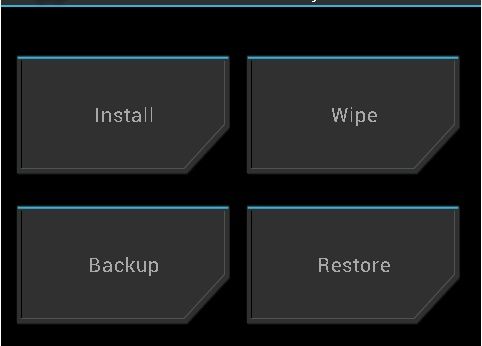
- When the HTC One boots up select RECOVERY from the list. The HTC One will restart and the TWRP recovery menu will appear. If done correctly it will look like this
- Tap Install.
- Browse to wherever you saved the SuperSU zip file you downloaded and copied to the HTC One.
- Confirm that you want to flash the selected zip file.
- Once done choose the Reboot option in TWRP to reboot the HTC One.
Once the HTC One reboots, to verify the phone has been rooted properly, simply look for the SuperSU application icon. Once you see this you have successfully rooted the HTC One.
답글 남기기