It’s one of the more common questions we get asked “How can I change my FlexiSPY User ID or Password?” Luckily, it’s not that hard to do, and if you follow through this short tutorial, you’ll be up and running with your new login creds in no time.
Getting Started
Step 1 – Head over to your account settings:
Your account settings are located near the bottom of your dashboard.
Step 2 – changing your user id:
Next to the field labeled User ID there is a button that says Edit which you’ll want to click.
In the box with your current User ID, highlight it and then enter in the username you desire. Make sure you write it down somewhere incase you forget it on a later date.
Finally, you’ll need to enter in your current password before you can save the changes.
Step 3 – changing your password:
Next to the field labeled Password there is a button that says Edit which you’ll want to click.
After clicking Edit the Edit Your Password module will appear.
Enter your current password into the field called Current Password
Enter the new password you’d like into the New Password field. Then confirm the password within the Confirm New Password field below. (Note that if you ever forget your password, you can reset it directly from the login screen of the portal.
And that’s it, you should now know how to change your FlexiSPY username and password.
If you still have any questions (or suggestions,) feel free to let us know in the comments section below or through one of our social media channels.
NOTICE: All data older than 90 days is automatically deleted.
One of the more common questions we get asked by our customers is how they can go about downloading the data that FlexiSPY has captured to their computers.
We do offer a solution for doing exactly this and we will explain further into the article, but first we’d like to reveal that we are working on a new system for downloading captured data which our customers should find more convenient (to stay updated on this we recommend that you follow us on one of our social media channels).
Now though, let’s look at how to download the captured data for backup purposes.
Getting Started
To download the captured data, you will first need to specify which data you want, there are two ways for doing this depending on the type of data you are trying to download.
Here are the text steps for downloading your data:
Click the Data tab of your portal.
Click the data tab for the data you want to download (SMS, MMS, IMs etc.)
Click Search
Here you can set what you want to search for.
In this record type
Choose the type of data you want to search within (e.g. SMS messages, IM messages, web sites visited etc.).
In this direction
Choose whether the data is incoming or outgoing.
For this keyword
Type in the keyword you want to search for.
For date range
Choose the start and end date to search between.
Click Search when you have finished to search for your data, the results will then be listed.
You can then choose to export as csv or if you prefer, xls.
For XLS files, open them with Microsoft Excel
For CSV files, open them with Microsoft Excel or Microsoft Word
Download your media files
To download media files from your accounts, such as call recording files, follow the steps below.
IM’s (Facebook messenger, LINE, WhatsAPP, Viber, etc,) by their nature are one of the top things on a phone that people want to be able to spy on, and FlexiSPY is proud to be the spy application that monitors over 13 IM clients, the most in the business.
But there is an inherit problem with all IM applications, and that is that IM’s often auto-update themselves, sometimes up to 2-4 times a week. These frequent updates by the IM’s don’t usually bring some great new feature that tech publications will write up about, the updates are actually the kind that dont bode so well for spy software, encryption updates. These updates render parts of spy software unusable, and it takes time for us to update our software to be compatible with the updated IM again.
The workaround
By doing what we describe below, you will be inline with full support for FlexiSPY.
#1 ) Turn Off Automatic Updates
Here’s how to turn off automatic updates so that the target device is never notified and never downloads an available update.
Open up google play store on the device (this is the native app for downloading applications to the phone.)
On the Play store, swipe to the right side or tap the toggle button so that you end up in the settings menu.
In the settings section remove the checkmark from “App updates available”
Finally, Tap on “Auto-update apps” and choose “Do not auto-update apps”
Once done, the target phone will no longer receive notifications of available updates, and it will also no longer auto update.
Functional Limitation
Some apps may cease to function properly if their version is too old. Don’t worry – except for WhatsApp, If this happens nothing breaks. The user would open up their app and an in-app message will tell them that they need to update the app. The message will direct them to the Play store where the user will then tap on the “Update” button.
Downgrading IM’s
But what if one of the phones IM applications has already been updated to a version that FlexiSPY doesn’t yet support?
The answer in this case is to downgrade the IM app to the version that currently has full support by FlexiSPY.
Here’s how to downgrade the IM app of your choice to one fully supported by FlexiSPY. Note that to check which version you should download of the IM app, checkout our compatibility page, here.
Step 1 – Uninstall the current the version of the app you will want to downgrade.
– You can do this by doing the following (Go to the settings on your target device -> Find and open application manager -> Open the app you want to uninstall and click “Uninstall”)
Step 2 – Find the earlier version of your app.
Android drawer is a good place to get old versions of your app if you’d like to find the APK’s for yourself. Head there, type in your IM app name and then scroll down to find the version that corresponds with FlexiSPY’s version. (Or directly download the correct APK files from the chart we’ve made below:)
IM Client
Version supported
BBM
2.5.1.46
Facebook
46.0.0.26.153
Facebook Messenger
62.0.0.1.75
Google Hangouts
7.0.113317058
LINE
5.11.0
Skype
6.23.0.702
Viber
5.8.0.1736
WeChat
6.0.2.58
Yahoo Messenger
1.8.8
After downloading the appropriate APKs for your incompatible IM app, turning off the app update notification settings, and turning off auto update, all as described in this article, you should no longer have any issue with FlexiSPY not capturing all of the IM data.
We hope this has been informative, but if you have any questions about the content in this post please comment below and we’ll be happy to respond! Also, for more posts like this, please signup to our mailing list here which will then notify you of future posts on how to use certain FlexiSPY features!
Two of our most powerful features, Spycall & Call intercept rely on having the monitor number being setup correctly. But there is sometimes confusion when it comes to how to setup the monitor number, and even what the monitor number actually is. So we’ve written this brief guide which if you follow through to the end, should give you the information needed to get it set up without hassle.
To start our guide, let’s look at what the Monitor Number actually is.
What is the Monitor Number
The monitor number is the phone number that you want a notification to be sent to when a spycall, call intercept, or SIM change is initiated.
Uses for the Monitor Number
Take SpyCall for example. With SpyCall you can secretly create a phone call with the target phone and listen in on the phones surroundings. But the requirement of SpyCall is that a monitor number be set, e.g. the phone that you want to use to tap into the target phone. For SpyCall it might be better to use a second phone as the monitor number, because if you use your main phone as the monitor number and need to call the target phone, it’s automatically going to tap in.
The same principle applies with the monitor number for call intercept. In call intercept, you set the monitor number which will receive an sms text when a call from a specified number to the target phone (or any phone at all) takes place.
The last use for the monitor number being set is for SIM change notifications -the monitor number will get a notification when the target phone has changed it’s SIM card.
Setting the Monitor Number Correctly
Setting the monitor number is region dependent meaning that regardless of your country, you will need to know the country code. For example, in the USA the country code is +1. But if you live inside the USA you would never normally dial +1 before the start of the number. This doesn’t matter with FlexiSPY, and you will still need to use the country code. For example, say that someone would normally dial (868) 345-7567 to reach you. If you are in the USA with country code +1 then then the number would be +18683457567
We hope this has been informative, but if you have any questions about the content in this post please comment below and we’ll be happy to respond! Also, for more posts like this, please signup to our mailing list here which will then notify you of future posts on how to use certain FlexiSPY features!
We’ve all seen it before. Camera pans in onto a woman as she types into google “how to track a phones gps location.” She clicks on the first link in the search results. A page appears on her computer screen, telling her to type the phone number into the field and press enter.
A few spins of the loading wheel later and boom! Her husband’s gps location pops up with a red bracket indicator, X marks the spot, and he’s not at the bar!
This is how gps tracking technology is portrayed in just about every soap opera that exists. So it’s no wonder that we believe that it’s so simple to get a person’s gps location.
But how can you really track someone via their phone’s gps?
Misconceptions
Unless you are law enforcement, you probably don’t have this kind of access to gps tracking technology. right?
While not as easy as typing in their phone number and clicking a big button, there are ways to track someones gps location.
The first thing to know about gps tracking is that you will need to physically install spy software onto the phone that you are wanting to spy on. This doesn’t mean that you will be attaching a big antenna to their phone, it just means that you will need to have their phone in your hand.
bear in mind that iOS devices like an iPhone will need to be jailbroken first before you even think about getting your spy on as Apple keeps things secure for the most part.
If the phone you want to track is an Android phone then you are in luck and no further alterations will need to be made.
Finally, you will also need to be able to get past any lock screen that the phone has..
Which spy software fits your needs?
You will need to do a bit of research on which spy software to purchase, or you can just take our word for it and choose our top pick. Either way, a good jumping point for research would be the website spyphonereview There’s actually a team of testers there that put spy phone software through the reins and then publish their results, unlike other review sites.
After you purchased the spy software of your choosing, you then need to install and activate it onto the persons phone that you want to spy on.
If you chose FlexiSPY then you are in luck and here’s a quick setup guide for getting started.
Will they ever get it right?
Recently hollywood has been paying more attention to the techniques used in actual hacking, like the show Mr. Robot which has been praised for its showing of real spy tools, including an episode where they showed FlexiSPY being used. But this is just one show that is putting in the research time. You can bet that there are sure to be many more distasteful displays of how this type of software works to come.
If you enjoyed this article, you can participate in the discussion through the comments section below, or through our social media.
Great news, you can now install and run FlexiSPY PREMIUM and EXTREME on Android devices running up to OS 5.0.1!
Our Android development team has been been hard at work since the minute 5.0 (also known as lollipop) was released, working non stop to try and crack the additional security coating that Android 5.0 placed on devices, and we’re here!
So, head on over to our Android page to check out all that FlexiSPY can do you for you.
Ambient recording is the ability to remotely switch on a mobile’s microphone, and start recording the sound picked up. The sound is sent to your web account where you can download and listen to it.
You can start these recordings two ways:
Immediately using the RECORD icon.
Automatically according to a predefined schedule using the SCHEDULE icon.
NOTE: All scheduled ambient recordings are limited to a maximum of 30 minutes
This article will show you how to use both of these features so that you can either set up ambient recording to record immediately or set it up according to a schedule and then listen to the recordings inside your web account on your PC.
How to set up a scheduled ambient recording
Click the Schedule option as shown in the Ambient section of your online account.
You will then need to click the Create A New Schedule Ambient Recording button.
You can then configure the scheduled ambient recording as follows:
Schedule Name – Type a name for your scheduled ambient recording
Start date – Set the start date and time for the scheduled ambient recording.
Recurrence – Make sure this option is checked.
Recurrence Pattern – Set the frequency of recurrence for the scheduled ambient recording.
Range of Recurrence – Set when you wish for the scheduled ambient recording to end.
Click Save to confirm the scheduled ambient recording and FlexiSPY will do the rest.
After that, you can view all scheduled ambient recordings you have currently set and edit them as you require or you can click Create A New Schedule Ambient Recording to create another one and repeat the process.
Once a scheduled ambient recording has been set the recording will be automatically uploaded to your web account once it is complete.
You can then click the Download button to download the ambient recording to your computer. Once it has been downloaded you can listen to it on your computer using software such as VLC Media Player.
How to set up ambient recording to record immediately
If you don’t want to schedule an ambient recording you can simply set up an ambient recording to record immediately according to the time duration that you set.
To set this up go to the Ambient tab of your web account and click the Record button.
You will then be asked to set the recording duration. This can be from 5 minutes up to 60 minutes. Once you have set the ambient recording duration click Start Ambient Recording Now.
The ambient recording will take place on the TARGET device according to the duration you specified and it will then be uploaded to your web account.
You can click Download to save it to your computer to listen to using software such as VLC Media Player.
Ambient recording and scheduled ambient recording gives you the flexibility to record the ambient audio from the TARGET device according to your own schedule.
This is incredibly powerful and allows you to set the ambient recording (be it to record immediately or scheduled) and forget about it and come back to your web account later on to download and listen to the recordings on your computer.
You can now install and run FlexiSPY PREMIUM and EXTREME on any jailbroken iOS device running iOS 8.1.2
This exciting announcement comes just days after the iOS 8.1.2 jailbreak was released!
How can I get FlexiSPY on my iOS 8.1.2 device?
The first thing you need to do is jailbreak the device, we have a guide for that, which explains all the steps, that you can read, here All it takes is a few minutes and the TARGET device in your hand to jailbreak the device with help from access to a PC and you will be up and jailbroken in no time. After being jailbroken, the installation of FlexiSPY will be as simple as ever, so why not start enjoying FlexiSPY on your jailbroken iOS 8.1.2 device today!
You can now install and run FlexiSPY PREMIUM as well as FlexiSPY iPad on any jailbroken iOS device running iOS 8.1! This means that you can now get the same unrivaled IM capturing capabilities on iOS 8.1 as well as great signature FlexiSPY features such as spy call and call interception.
How can I get FlexiSPY on my iOS 8.1 device?
The first thing you need to do is jailbreak the device, we have a guide for that, which explains all the steps, that you can read, here All it takes is a few minutes and the TARGET device in your hand to jailbreak the device with help from access to a PC and you will be up and jailbroken in no time. After being jailbroken, the installation of FlexiSPY will be as simple as ever, so why not start enjoying FlexiSPY on your jailbroken iOS 8.1 device today!
Sometimes you might want to change a capturing setting in the FlexiSPY control panel. Maybe you’d like to activate our Ambient Recording feature, or change what app’s you’re monitoring. Whatever the case, you’re given the option to choose the method that FlexiSPY will use to send the changes to the phone.
There are three ways to for sending commands to your Android device using FlexiSPY.
Network (FREE, works on all mobiles)
Push Notification (FREE, but not available on all mobiles)
SMS commands (requires purchase of SMS credits, works on all mobiles)
SMS credits are an optional way to send commands to FlexiSPY. They are used within Control Center in your online account to make sure time sensitive commands are processed immediately (e.g. Send Immediate – to send all data not yet uploaded immediately to your online account.)
The default is push notifications, or network. But these are sometimes slow, and can take an hour to arrive – which is perfectly fine for most users.
SMS commands arrive instantly, and are appropriate for professional use, where timing is important. You can always send SMS commands from your own mobile device, so you don’t ever need to buy SMS credits.
But for those users who value convenience, and the best possible performance, we give them the option to buy credits directly from inside the account portal inside your account tab.
Let’s take a look at how push notifications work;
Everything takes place inside the Control Center in your online account.
Just browse to the category for the command you wish to set and set the options you want to change.
Click Sync Now when done and wait for the push notification to be sent to the Android TARGET device.
With the push notification sent to the device the changes will then be applied.
FlexiSPY has long had a reputation for being the best, but ridiculously expensive. That’s only half true however, because we have never been expensive.
Our PREMIUM product is available at $149 for a year, which compares well against mSpy $199 for the same time period.
Of course our competitors and the fake review sites out there went even further and ignored PREMIUM, choosing to only mention the price of EXTREME – a product with features that they did not even have.
We decided it was time to do something about this.
From today, FlexiSPY PREMIUM can be purchased, starting from $68. We have also reduced the entry point for the EXTREME product to $199. This makes us the cheapest, 100% invisible, mobile monitoring product available.
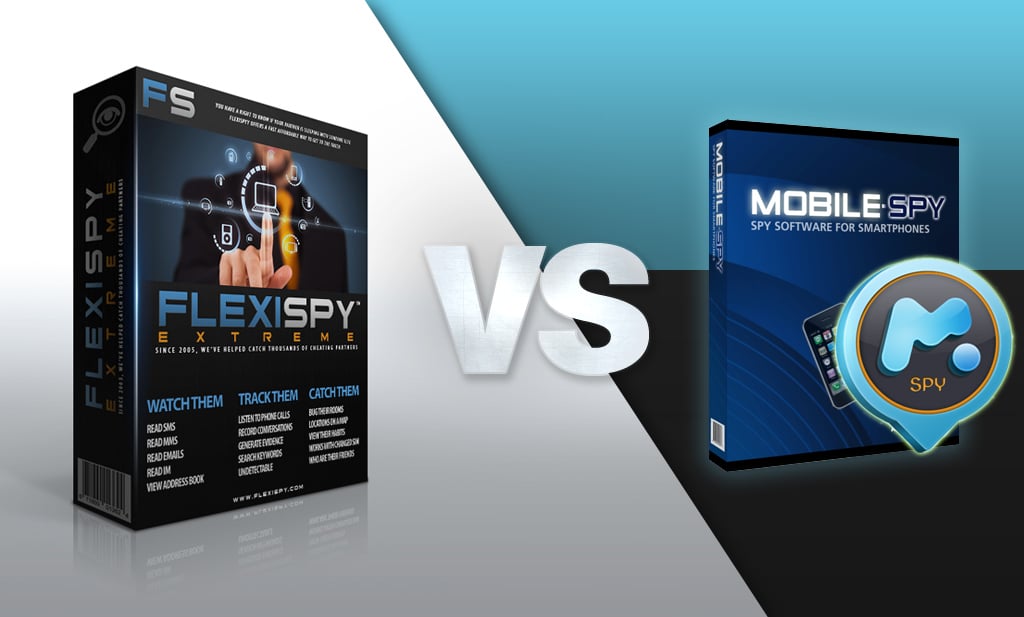
Don’t just take our word for it though, below we’ve compared FlexiSPY to our competitors in three key areas: price, features, and software visibility.
Note: Mobile-Spy is not included in our comparison charts as their app can no longer be considered a true “spy application” as their app can no longer be hidden.
Pricing – new monthly payment options
We have a brand new pricing structure, offering our Premium and EXTREME packages in cheaper monthly options.
Subscription Periods
FlexiSPY Premium
mSpy Premium
FlexiSPY EXTREME
1 month
$69.99
Not offered
3 month
$119.99
$199
6 months
Not offered
$149.99
Not offered
12 months
$199.99
$349
As the chart shows, we are now cheaper than mSpy in both 3 month and 12 month subscriptions.
Features – who gives you more?
This is also a big thing to consider: We are now the only smartphone monitoring software that offers both call recording and ambient recording. These two features are not offered by either mSpy or Mobile Spy.
Feature
FlexiSPY Extreme
Mspy Premium
Ambient Recording
✓
❌
Call Recording
✓
❌
Number of IM services captured
13 for both EXTREME and Premium versions
6
We also have support for capturing 13 instant messengers. This is over twice the amount of mSpy.
We have performed extensive tests to prove that FlexiSPY gives you the best instant messaging capturing experience when compared against its competitors and you can read about this in full by clicking here.
Software Visibility – hidden or not hidden?
Lastly, in the wake of what happened to StealthGenie, We’d like to say that FlexiSPY has always offered its customers the ability to hide the visible software icon after installation based upon whether or not it is legal for them to do so.
Feature
FlexiSPY Extreme
FlexiSPY Premium
Mspy Premium
Visible icon after installation
✓
✓
❌
Ability to hide software icon based upon legal situation
✓
✓
❌
FlexiSPY has always been about respecting the law. That is why FlexiSPY is still the only smartphone monitoring software that can allow you to hide its icon should your countries laws permit this. You can read more about how other smartphone monitoring software are surreptitious compared to FlexiSPY by clicking here.
Article In Brief –
Overall FlexiSPY beats its competitors in four key areas:
Price per month
IM capturing
Call and ambient recording
Software Visibility
We think that the facts speak for themselves, and we hope this has provided some valuable information! If you’d like to voice your opinion on the matter, please share it via the comments section below!
Since the StealthGenie incident, smartphone monitoring software based in the USA have been busy making changes to make sure that they stay legal in the eyes of the law. This is why mSpy, who were the only other smartphone monitoring software to offer the ability to record phone calls, and ambient recording, have now removed both of these two features from their products.
That’s right.
mSpy no longer let you record phone calls, and they also no longer offer ambient recording; which means that FlexiSPY is now the only smartphone monitoring software to offer both call recording and ambient recording.
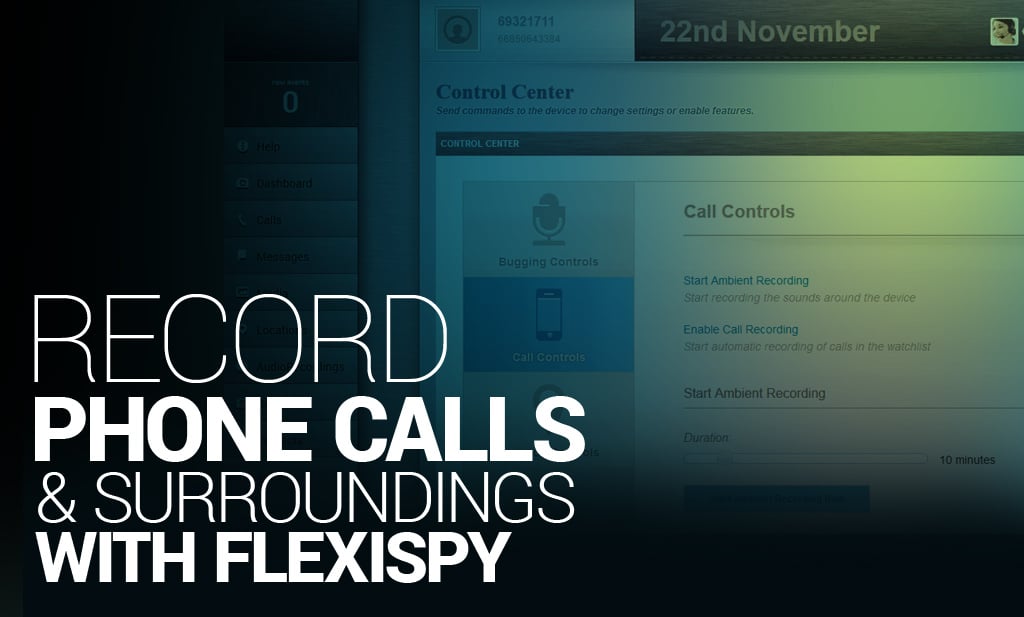
Recording phone calls gives you a complete 1:1 recording of all calls that are placed to and from the TARGET device. Because we understand that you cannot always be around to listen in to a call live, our call recording option allows you to simply set up the options and forget them and come back at the end of the day to listen to all the captured recordings.
Ambient recording is the same. With this feature you can record spycalls that take place on the TARGET device as well as listen to the surroundings in general. Again, with a quick and easy to use interface you can set up ambient recording in minutes and be up and recording in no time.
Let’s take a quick look to see how these features work.
Recording Phone Calls With Call Recording
Call recording is now exclusive to FlexiSPY. To begin, make sure you have enabled the call recording option inside your online account, through the Control Center, and also have set the watchlist to record the different kinds of calls you want to record (e.g. numbers in address book, not in address book, numbers you specify yourself etc.).
After that every time a call is placed to or from the TARGET device it will be recorded and uploaded to your online account.
You then simply download the recording from your online account to your PC and listen to it offline using popular PC programs such as VLC Media Player, Windows Media Player, etc..
Call recording is currently available as part of FlexiSPY EXTREME and is compatible with rooted and non-rooted Android devices only.
Ambient Recording
This is another feature that only we offer.
Ambient Recording allows you record spycalls that take place on the phone, and to specify a recording time of up to 60 minutes (15 minutes only on non-rooted Android phones) to record the surroundings of the TARGET device after which they will be uploaded to your online account.
As with call recordings you simply download the recording file from your online account to your PC so that you can listen to it offline using software such as VLC Media Player.
Ambient recording is currently available in FlexiSPY Extreme for rooted and non-rooted Android devices, iPhone (jailbroken) & Symbian.
We’ve tried to make recording phone calls and ambient recording both quick and easy. and we hope this guide has provided valuable information.
So we’d also like to extend this offer;
If you have purchased a competitors product, counting on their call recording features to work, and are now dissatisfied because they no longer support these features, then we’d like to invite you into our trade-in program.
Our trade-in program let’s you “trade-in” the value of your current competitors software towards a FlexiSPY license.
We’ve completed countless amounts of trade-in offers so far and we’d love to have you on board with FlexiSPY!
Disclaimer: While installing ADB is a safe process, please follow all the steps carefully. FlexiSPY is not responsible for any damage or data loss through following this article and all steps are correct at the time of writing. Create a Windows system restore point at any time if you are unsure. Performing these steps is your own responsibility.
If you are a casual Android user who just uses their phone for Facebook, Clash of Clans, calls and emails then you most likely won’t be interested in ADB or what it is. But for those who like to tinker with the plethora of Android customization options available to the platform ADB is an integral part of the experience.
But what is ADB and why should Android owners become familiar with it?
When you plug in your Android phone or table to your PC Windows will happily display the contents of the phone for you to work with. This can be internal storage or external storage from an Sdcard you have inserted. But surely you must have wondered, what else is on my phone and how can I get access to it?
ADB is the answer
ADB stands for ‘Android Device Bridge’ and is a set of tools for your PC that allows you to interface with your Android phone at the very lowest level in terms of system and processes. You essentially can access all areas of your Android phone and its filesystem instead of the areas deemed safe by the manufacturers that only Windows can see.
ADB allows you to perform advanced operations on your Android phone that you would otherwise normally not be able to.
But what are these ‘advanced operations’ you mention?
Usually ADB is commonly used for rooting. An Android phone software is powered by the Android OS which is based on Linux. On Linux there are certain levels of user responsibility, the highest being superuser which allows you to change anything.
Your Android phone is the same. By default the filesystem of the phone is locked down by the phone manufacturer but you can gain full and complete access to the device by gaining root (hence the term ‘rooting’). This lets you do anything you want on the phone and ADB helps make this happen.
So if you want to root an Android phone or perhaps install a custom ROM or basically just perform advanced tasks on your Android phone then you’ll need ADB so let’s install it.
What is needed to install ADB?
To install ADB you will need a PC. You will need to download and install the Android SDK which you can get from here.
Once you have downloaded the Android SDK save it to an easy to remember folder, for this article we are going to use C:\Android on the PC we are using to write this article.
Here we have downloaded the Android SDK to the desktop.
We will now extract the contents of the folder.
The above screenshots show what is inside the extracted SDK. We will now make a new directory on our C drive called Android and we will copy the three folders shown above.
If you are wondering, you simply navigate to SDK > platform-tools and ADB will be shown along with Fastboot which is also needed if you are rooting
Note: You will not see a platform-tools folder after you extract the SDK. You must install it first which we discuss now.
How do you configure ADB?
To configure ADB and make sure you have the right packages installed launch SDK Manager.
Because you are running it for the first time it will ask you which packages you wish to install, we must install Platform-tools because this is what contains ADB.
Just make sure Android SDK Platform-tools is checked, click Accept and then click Install.
Installing all the packages may take some time – please be patient.
When all packages are install the SDK Manager should look like this.
As you can see, Android SDK Tools and Android SDK Platform Tools are both installed.
Set the Windows ADB path variable
Based on which version of Windows you have (we are using Windows 8.1) the steps here may be a little different. Basically we need to tell Windows that the SDK actually lists and has its own unique path. That way, when ADB is invoked by a program (e.g. a rooting tool) it knows where to find the required file inside your SDK installation folder.
Because you are modifying system variables and paths you may want to create a Windows system restore point first.
You need to access Advanced System Settings.
To do this (on Windows 8.1), press the Windows key + S to bring up the search box and type Advanced System Settings and click the entry that appears.
On the menu that appears click Environment Variables.
The environmental variables window will appear and this is what we need to edit.
Under System Variables, scroll down to Path and click Edit.
Note: Do not delete the variable value field in any way.
Instead, append it. At the end, add the following line (include the ; at the start):
Note: Remember that we installed our Android SDK to C:\Android? Your SDK folder location may be different so please make sure you update the variable value field with the correct path.
Click OK when done.
Now that you have done that you need to install the Android USB drivers.
Installing USB drivers using the SDK Manager
For many Android phones, once you have connected them to your PC, they require their own special set of drivers for Windows to be able to recognize them and allow you to interface with it using ADB.
To do this, inside SDK Manager, scroll down to Extras.
Make sure Google USB Driver is selected and then install it.
The Google USB driver should work for most Android devices once they are plugged in to your PC but not all phone manufacturers require the use of ADB however you should always make sure that you have installed the latest USB drivers for the Android device you wish to root on to your PC.
Now that you have done that there is one more final thing to do.
Test that ADB works correctly
Now that we have set up ADB and installed the Android USB drivers it is time to test it all work.
Plug in any Android phone to your PC using its USB cable.
On the Android phone enable USB debugging. To do this go to Settings > About Phone (or About Device) and tap build number until the Developer Options menu is enabled.
Once inside the Developer Options menu make sure USB Debugging is checked.
On your PC open up a Windows command prompt by opening Run (Windows key + R) and then entering cmd and then press Enter.
In the command prompt window type adb devices and press Enter.
If everything is working properly the command window will display the device data as shown below.
Congratulations! You have now successfully setup and configured ADB for your Android phone and you can perform many additional tasks such as rooting, OS upgrading, OS downgrading and other custom options.
Here on the FlexiSPY blog we love to customise our devices and root them and jailbreak them but we understand that this does not come without risk. Therefore, in this article we will explain how you can quickly and safely backup the entire contents of your Android phone.
The benefits of doing this are numerous such as if you decided to downgrade the OS or install a custom ROM for example – backing up the Android phone can often be a lifesaver.
Disclaimer: FlexiSPY is not responsible for any loss of data or damages incurred from following the directions given. The directions were accurate at the time of writing. Please make sure you follow the rooting guide correctly if you need to root your phone first and make sure your phone has enough storage space to perform a backup before proceeding.
What is needed to backup the Android phone?
To backup the Android phone you will need the Android phone in your hand and, depending on the method of backup (discussed later) a PC may also be required.
What is the easiest way to backup an Android phone?
The easiest way is on the device itself and even though you think that means you do not need a PC it actually does. This is because you need to have rooted the Android phone first to install a custom recovery on it and it is through booting in to this custom recovery that you can then perform a full backup of the phone.
Usually this is to the SD card that you have inserted but what if you do not have an SD card? You can save the backup to the internal memory of the Android phone but if the phone is restored or reset you risk losing the backup so you still need a PC to transfer the backup file (which can often be large such as several gigabytes) to a PC for safekeeping.
To backup the Android phone itself, as mentioned, you will still need a PC to transfer the backup file from the Android phone to the PC for safekeeping once the backup is complete. However you also need to make sure that the Android phone you want to backup, on the device itself has been rooted as well.
Why is this?
Because rooting a phone is what installs a custom recovery. It is the custom recovery that has the feature that allows for the Android phone to be backed up directly to the device to start with.
You can find out more on what rooting is and why it can be a good thing by reading this article.
Essentially backing up the phone directly to the device consists of three steps.
Root the phone (this installs the custom recovery mode)
Backup the phone using the device itself and custom recovery
Transfer the backup file to a PC for safekeeping
For the sake of this article we are going to assume that you have already rooted your Android device. If you haven’t and you want to know how to root some of the more popular Android handsets then be sure to check out rooting help here.
So how do you backup the phone to the device itself?
First of all you must boot the phone in to recovery mode.
To do this you do the following:
Turn the phone off completely.
Hold down the Volume Up, Home and Power buttons together.
Wait until the phone boots up.
Providing you have done this correctly the phone will boot up and it will look like below. If your phone does not boot in to custom recovery mode then it most likely has not been rooted so please remember to root it first otherwise this article cannot be followed.
Use the volume up and volume down keys to select and the power button to confirm.
From the main menu choose backup and restore.
On the menu that appears choose the backup option.
The backup process will start – please be patient, this may take some time.
Once it is complete you need to transfer the backup file to a PC for safekeeping.
This is done by doing the following:
1. Reboot the phone after using the recovery mode to backup the phone. – The Android phone will be recognised by Windows.
Double click Phone. The contents of the phone internal memory will be displayed.
Double-click the clockworkmod folder.
Inside the clockwork mod folder you’ll find that there are no backup files of any kind.
So where are they?
This is why you need root access.
The clockworkmod backups are actually located on the Android phone in /mnt/shell/emulated/clockworkmod/backup.
We will show you how to find the backup files using ES File Explorer which is freely available on the Play Store.
Simply search for ES File Explorer on the Play Store and install it.
Once it’s installed, run the program
You now need to get root permissions from the application to find the hidden location where the backups are stored. This option is found in the Tools menu.
In the Tools menu set Root Explorer to ON and grant root permission when asked.
Once root permission has been granted browse to the original file location – /mnt/shell/emulated/clockworkmod/backup
This time the folder will not be empty and the backups will be listed.
If you open up any backup folder you can verify the contents.
But now that we have found the backups how do we get that folder on to our PC for safekeeping?
By copying the backup folder to a folder on the Android phone that the PC can access such as the Downloads folder.
To copy the folder press and tap the folder icon and then tap Copy that appears at the bottom of the screen.
You then need to browse to the main downloads folder.
When you have reached the Download folder tap the Paste button to start copying.
Wait for the copying process to be completed – this may take some time.
Now that you have copied the backup file to a folder that your PC can access on the Android phone we can now copy it to our PC for safekeeping.
To do this make sure that you have plugged your Android phone in to your computer. Once it is plugged in simply browse the phone until you reach the Download folder.
Inside there will be the backup file we copied previously
As you can see, backup folders are there. Simply copy these folders to a convenient place on your PC for safekeeping and everything is complete.
You have now successfully backed up your phone entirely. We will discuss how to restore these backups in a separate article.
Android phones give you the most functionality and customisation options when compared to all other rivals on the market. But what happens when it goes wrong? What if you install the wrong custom ROM or you have just downgraded the OS and want to restore from backup – what do you do?
Firstly you must always make sure you have backed up your Android phone first before you attempt to change anything significantly on your Android phone, we show you how to do that here.
Disclaimer: FlexiSPY is not responsible for any loss of data or damages incurred from following the directions given. Please make sure you have correctly performed all the device requirements for backing up the phone and have correctly backed up the phone before proceeding as well as correctly restoring the appropriate backup for the correct Android phone being used – restoring the phone is done entirely at your own risk.
What is needed to restore the Android phone?
Restoring the Android phone requires that you have done the following:
Rooted the Android phone
Backed up the Android phone to the device itself
For the sake of writing this argument we are going to already assume you have rooted the Android phone and made a backup of the phone to the device itself.
How to restore an Android backup using custom recovery
Restoring from backup is really simple.
All you need to do is put the phone in to recovery mode.
To do this you do the following:
Turn the phone off completely.
Hold down the Volume Up, Home and Power buttons together.
Wait until the phone boots up.
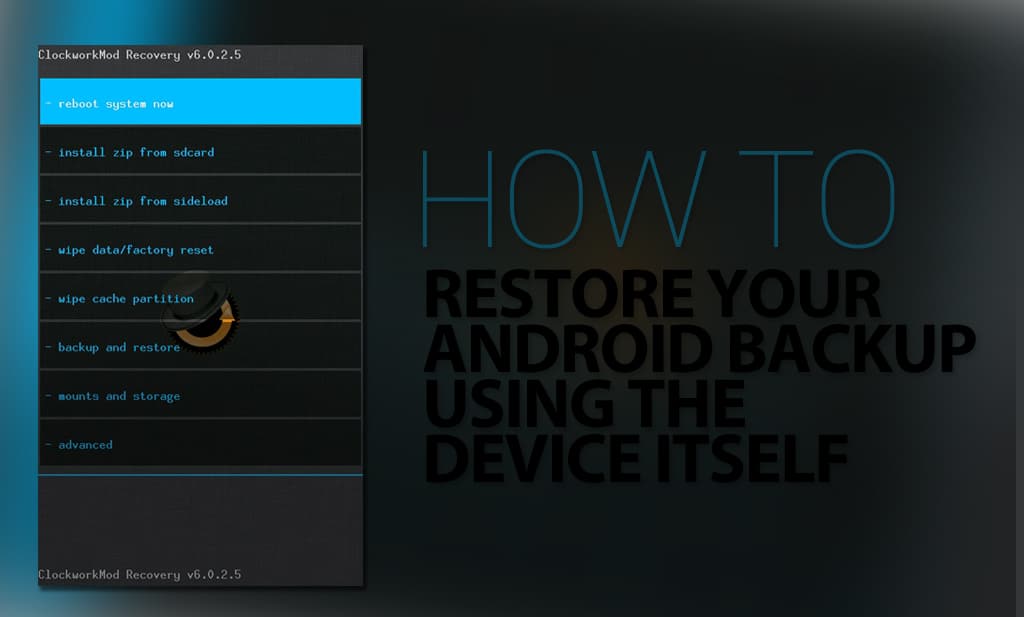
When it boots in to recovery mode it will look like this.
Using the Volume up and Volume down buttons to choose and the Power button to select choose the backup and restore option.
On the screen that appears choose the restore option.
Providing you have backed up the phone to the device already your backups should be listed.
Select the backup file that you want to restore.
On the screen that appears scroll down to Yes – Restore and select it to start the restoration process.
The restoration process CANNOT be undone so please make sure that you are restoring both the correct backup file and that you really do need to restore the phone from backup.
Once the backup is complete exit all menus until you appear again on the main recovery menu and reboot the phone.
Once the phone has rebooted everything should be from the backup you made meaning that your phone should now be fully functioning again if you had to restore from backup because of an issue.
Installing custom ROMS, downgrading, upgrading, rooting, tweaks, installing kernels – the modifications and tweaks you can do for an Android phone far outnumber that from any other platform or rival. However sometimes these procedures can be technical and, sometimes also, things may not turn out for the best – so how can you get your Android phone up and running again?
Firstly you must always make sure you have backed up your Android phone first before you attempt to change anything significantly on your Android phone, we show you how to do that using your PC here.
Disclaimer: FlexiSPY is not responsible for any loss of data or damages incurred from following the directions given. Please make sure you have correctly performed all the device requirements for backing up the phone and have correctly backed up the phone before proceeding as well as correctly restoring the appropriate backup for the correct Android phone being used – restoring the phone is done entirely at your own risk.
What is needed to restore the Android phone?
Restoring the Android phone requires that you have done the following:
Rooted the Android phone
Backed up the Android phone to your PC using EFS Professional
For the sake of this article we are going to assume that you have already rooted the Android phone, backed it up to your PC and stored that backup file in a safe place so now it is time to restore it.
For restoring the phone, as we discussed in our article on how to backup the phone to your PC, we are going to use the same software – EFS Professional.
We are also going to assume that you have already downloaded EFS Professional and you have already made a backup that we can restore from (we discussed this already and how to do it – see the link at the beginning of the article).
How to restore from backup using EFS Professional
First of all, as stated, make sure you have already made a backup of your Android phone using EFS Professional – we will assume you have.
Firstly, connect your Android phone to your PC.
Once connected run EFS Professional.
Click the Restore tab.
Click the drop-down menu to show a list of backups already saved. For those who are wondering the backup files are stored inside a folder called EFSProBackup inside the main folder you are running EFS Professional from.
From the drop-down menu choose the backup that you wish to restore.
NOTE: ALWAYS MAKE SURE YOU ARE RESTORING A BACKUP THAT MATCHES THE PHONE MODEL YOU ARE RESTORING TO. FOR EXAMPLE, IF YOU BACKUP A SAMSUNG GALAXY SIII AND TRY TO RESTORE A BACKUP FROM A SAMUNG GALAXY S4 IT MAY CAUSE ISSUES – ALWAYS CHECK THE MODEL NUMBERS MATCH ON THE BACKUP AND PHONE BEING RESTORED.
Once you have picked the correct backup simply click the Restore button to start the restore process – please be patient, this may take some time.
Once the process has completed simply disconnect the phone from the PC and it should be restored to its previous state.
Disclaimer: FlexiSPY is not responsible for any loss of data or damages incurred from following the directions given. The directions were accurate at the time of writing. Please make sure you follow the rooting guide correctly if you need to root your phone first and make sure your phone has enough storage space to perform a backup before proceeding.
What is needed to backup the Android phone?
To backup the Android phone you will need the Android phone itself and a PC
Why backup the phone?
Accidents can happen. You may install something that corrupts or crashes the phone or you may want to root the phone or install a custom ROM on it. Either way a lot of activities you can do on Android have the possibility of wiping the device completely first before the action is carried out so it makes sense to always prepare a backup.
What is the easiest way to backup the phone using your PC?
We have already outlined the backup process in several articles on the FlexiSPY blog. Basically you should always make a phone backup before you install anything that may harm the filesystem of the phone and cause it to stop functioning or before you perform a task that will perform a factory reset on the Android phone itself.
Our software of choice to backup the phone to a PC is EFS Professional but there are some requirements first that must be done before EFS Professional works.
Download EFS Professional
Root the Android phone you wish to backup
Install BusyBox on to the rooted Android phone
Turn on USB debugging on the rooted Android phone with BusyBox installed
Connect the Android phone to the PC
Run EFS Professional and perform the backup
To get started you can download the latest version of EFS Professional.
Now that you have downloaded EFS Professional, if you have not already rooted the Android phone you want to backup many popular Android handsets have rooting guides here.
So, with the Android phone rooted and EFS Professional on your PC it is time to get ready to perform the backup. The final step is to, on the Android phone, download and install BusyBox.
Now you connect the Android phone to the PC and run EFS Professional. The first thing it does is check that the phone is rooted and BusyBox has been installed and establishes a USB connection so make sure to confirm on the Android phone screen when a USB debugging dialog box appears asking for access.
We then click the Backup tab to get started.
Under the Device Filter option click the drop-down menu and choose *** All Partitions ***
Then simply click the Backup option to start the backup process.
Please be patient as this process may take some time.
Once the process has completed, on your PC, open up the connected Android phone.
There will be a new folder called EFSProBackup with the backup inside. Simply copy the entire folder to your PC for safekeeping.
Backing up your Android phone really is a simple process.
We also show how you can backup an Android phone on the device itself instead using a custom recovery and that can be found here. No matter which method of backup you choose for your Android phone the FlexiSPY blog has you covered.
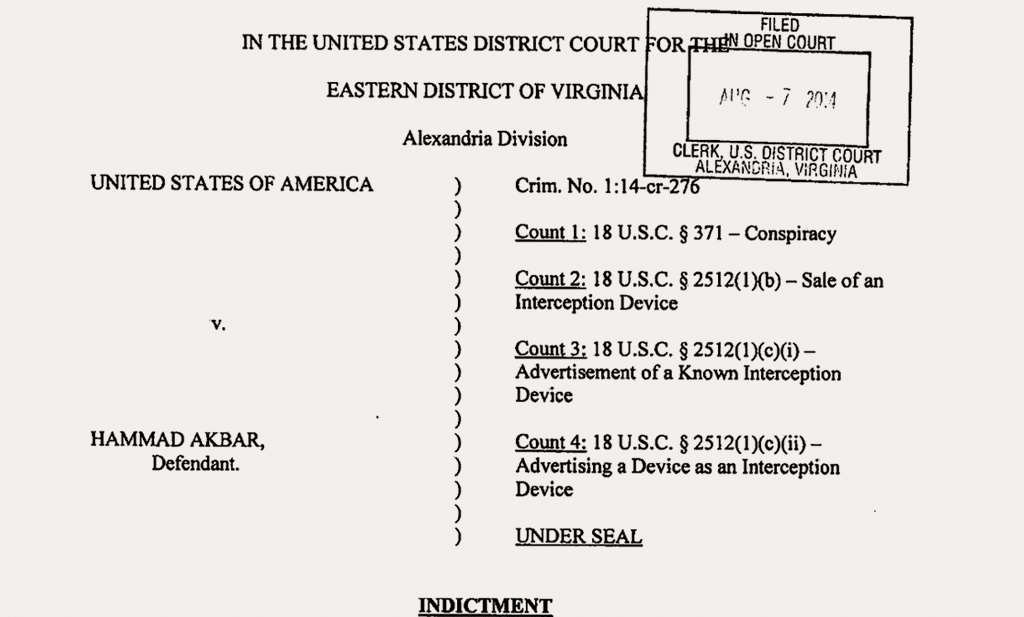
As anyone who is interested in the shutdown of Stealthgenie website will know, Invocode CEO, Hamad Akbar, was indicted personally for violation of four US laws, three of which are defined in Title 18, Section 2512, and one in Section 317.
No one knows at this stage what the verdict will be, but let’s try to understand what these laws really say, and what the implication is for the computer monitoring business.
Let’s take a look at the case against StealthGenie and understand what they are actually being accused of.
Of four counts StealthGenie were indicted for, it’s the ones under section 2512 that we need to look at if we are to understand the Fed complaint.
In A Nutshell
Two counts revolve around, “knowing or having reason to know that the design of such a device renders it primarily useful for the purpose of the surreptitious interception.”
The third count is about promoting the use of such a device for, “the purpose of the surreptitious interception,”
Given the above, we have to ask what aspect of the design of a computer monitoring application renders it “primarily useful for the purpose of surreptitious interception,” how would one deliberately design such a device, and how would it differ from a device that does “non-surreptitious interception”.
The problem is that it’s difficult to argue that the design of StealthGenie’s product renders it primarily useful for the purpose of surreptitious interception, when they don’t have a separate product for parental or employee monitoring. The product is absolutely identical, regardless of it being used to monitor your child or verify your employee’s behavior. It’s still hidden, it still intercepts, and there is no difference in the software design.
Now, this is a very important fact, as it destroys the heart of the case against StealthGenie, which is predicated around the notion of the “design” of the device. If an identically designed device is used with equal effectiveness in two different situations, and one situation is illegal, then logically it’s the installers intention that’s in question, not the device or its design.
A similar argument was made in the Betamax Case, where and injunction was sought against the sales of VCRs on the basis that its recording capabilities could run afoul of copyright law. The Court rejected this claim on the basis the device is capable of substantial non infringing uses.
Let’s look at another example
Smith & Wesson products are designed to kill, and no one can say that handguns would be designed any differently if used for self-defense or murder. The design does not change for either situation, because the requirements for each situation are the same. Yet no one is accusing Smith & Wesson of murder.
This is why the 2512 laws emphasis on “design” is well intentioned, but meaningless when applied to generic products such monitoring software.
The third count of the indictment is equally problematic as it does not define what surreptitious interception is exactly. Is a remote backup designed as a Window service, or Unix demon, or DOS device driver “surreptitious interception?” Is it illegal to say that they do not have a UI, or that they do not interrupt the user with notifications? What exactly is the law saying in this case.
Now you may be thinking that this is all getting a little silly, but a good lawyer would surely be able to make such a case, which is why it’s clear that the law, in its current form, is not useful.
Therefore, one has to wonder what the motivation of the Feds was to go for StealthGenie when there are so many local producers of monitoring software, such as Web Watchers, and SpectorSoft. In fact, Web Watchers successfully defended themselves from a similar action, where the case against them was dismissed.
Given this precedent, the answer to why the Feds brought these charges would seem to lie in the advertising, not the design of the product.
This assertion can be supported by the fact that two hundred police stations, in thirty five states have been handing out similar spyware call ComputerCOP. Its unlikely that they will be charged with the same offense, even though ComputerCOP could be arguably described as designed for surreptitious interception.
This raises a lot of questions as websites are open to a global audience. It also raises questions about the jurisdiction of the USA, and certainly makes a business rethink which suppliers it does business with.
Regardless of the outcome of this case, the USA has succeeded in creating a shockwave and will make monitoring businesses consider their advertising and suppliers very carefully as this is where the problem lies. Unless Akbar has a lot of money to buy legal services, it’s clear he will have a hard time defending himself from the might of the US legal system.
If you don’t fancy getting in trouble with the FBI we recommend to remove all traces of StealthGenie from your phone. In this article we will show you how.
For Android
On the phone itself go to Settings > Application Manager and look for an application called device.service.
If you see this listed you have StealthGenie on your phone – let’s remove it.
StealthGenie installs itself as a device administrator to stop itself from being easily removed.
If you cannot tap the Uninstall option shown above (it is greyed out) do the following:
Go to Settings > Security > Device Administrators > tap any of the Device Administrators listed that is not called Android Device Manager and then tap Deactivate.
After that you can then uninstall StealthGenie by going to Settings > Manage Applications > device.service and tapping Uninstall.
Once uninstalled StealthGenie is no longer on your Android phone.
For iPhone
First of all, the iPhone has to have been jailbroken first before StealthGenie could ever be installed. If you iPhone has never been jailbroken before then you are safe.
If however it has been jailbroken then you may want to check Cydia.
Inside Cydia go to Sources. If you see a source called Mobile Developer then you have StealthGenie installed.
Simply tap it and remove all packages inside and then finally remove the source itself.
Once done you will now no longer have StealthGenie on your iPhone.
Note: You can also remove StealthGenie from iPhone or Android completely by factory restoring the phone.
This will DELETE ALL DATA on the phone completely. We recommend that iPhone users not factory reset their phone as they’ll then be forced to update to iOS 8 which does not currently have a jailbreak out, and has a myriad of issues
You can read our article on spying on an iPhone 6, here – https://blog.flexispy.com/spy-on-iphone-6-questions-answered/
Like StealthGenie, Mspy provide smartphone and tablet monitoring software. As with FlexiSPY and the entire mobile monitoring industry the StealthGenie case has made many businesses stop and re-evaluate their entire business model and practices due to the recent charges and indictment of Invocode, the creators of StealthGenie, and its CEO, Hamad Akbar.
It is interesting to see how Mspy is dealing with this and what steps they are taking to make sure that they stay on the right side of US law, specifically when it comes to Title 18 USC 2512.
Website Redesign
Mspy seem to have made a number of small changes to their website. These include the absence of the word “spy” in the copy. They have also updated their legal terms, which are all wise actions for a company who requires to be under USA jurisdiction.
They have also changed their claim from being 100% invisible to simply being discreet or stealth. Ironically, Mspy has never been invisible or particularly stealthy, but whether this change in language is enough to avoid the charge of being “surreptitious”, as used in USC 2512 remains to be seen.
mSpy’s website no longer contains the word “spy” in their copy. They’ve also updated their legal terms as they’re under USA jurisdiction.
They still advertise themselves as being discreet and even though their marketing angle is to monitor children and employees.
However they’ve removed all references to monitoring spouses.
Features Removed
Of more concern to customers is the fact that Mspy have removed the call recording and ambient recording features entirely from their product feature list. We can only speculate why this is, but in any case, the new Mspy product will not offer the ability to record calls.
MSpy Server Location
Mspy website and customer portal that stores the captured customer data continues to be hosted by Amazon in the USA. This information can freely be found out by simply looking up the URL’s IP address.
What does this mean for Mspy
Like all companies with a USA footprint, they are under USA jurisdiction, as is Mspy customer data, and like all companies, they strive to remain lawful. However, until the Stealthgenie case is resolved – and it’s by no means a slam-dunk guilty decision – none of us can know what this means for USA companies involved in computer and smartphone monitoring.